
- Details
- Written by Tech Notes
- Published: 04 March 2018
How to upgrade Oracle Virtualbox To New Version
Introduction.
Upgrading the Virtualbox of Oracle does not involve anything special unless upgrade fails.
Most likely you have gotten the new version of Virtualbox downloaded or got a link for it to download and run (execute), and you are wondering one of the following:
- If you should uninstall the prior version first?
- Is it okay to execute the new version install program without doing anything to the old version?
- Any preparation needed prior to using the new version of Virtualbox?
Please note that I do not get paid to write these articles.
For reference, this article took more than 4 hours to create along with website related activity and topic research.
Answer.
As of writing this article, the answer is simply that you do not need to do anything special to upgrade your Virtualbox version. You can download and/or execute (run) the new .exe file from Oracle, and it will self detect the prior version and remove what is needed, and install the new version.
Upgrade Steps.
- Download latest version from Oracle VM Virtualbox Downloads, or use the link from the pop-up window notice you get within your Virtualbox.
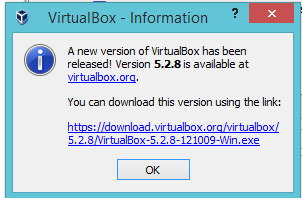
- Close Virtualbox after using the link to download the new version.
- Execute (run) the downloaded software.
- Select Next to start the installation.
- I suggest installing all that you may need locally on your PC, workstation, or server by selecting the pulldown menu and selecting "Entire feature.....". Click on next.
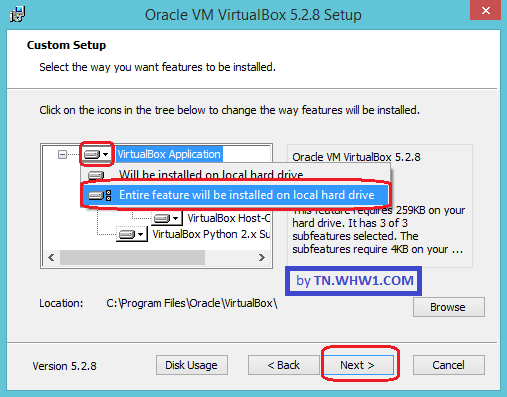
Note the above window won't show if you already have the same version installed, and a window with a choice to Repair or Remove will show instead.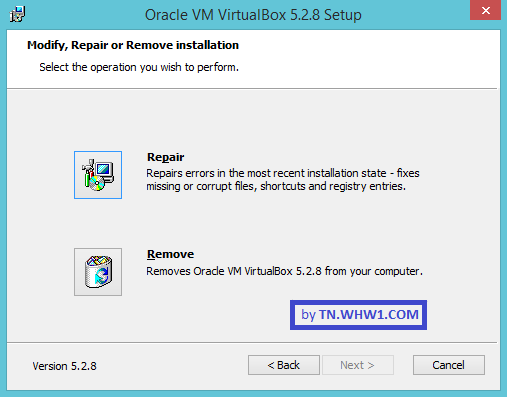
You will NOT see this unless trying to install same version. - On following window, leave all the checkboxes checked all or uncheck those you do not want. No harm is done if something is unchecked, but may make it harder to locate the software icon if it's not present in the location the checkbox is for. Continue to next window.
- Click Yes on next window. Unless you have an active remote connections (like SSH, RPC, FTP, streaming, P-2-P, etc.), which usually is not the case, or you can disconnect temporarily (not needed; can restart it if disconnected), then it's ok for network to get restarted. Even if you do have a remote session active, it's generally not a big deal as either it can be simply restarted or no remote disconnect occurs due to the fast restart of the network.
- Click Install.
- On some OSs, if you are not running as the Administrator (root) of the computer, then you will be prompted for the administrator password. Enter the Administrator password and next button.
- Wait and watch the install complete.
- Once done notice the checkbox on the following window. If you want the Virtualbox to start now, leave it checked and click on Finish, otherwise remove the check prior to clicking Finish to not start the Virtualbox now.
- Maybe Done with main software upgrade, BUT WAIT, there is more.
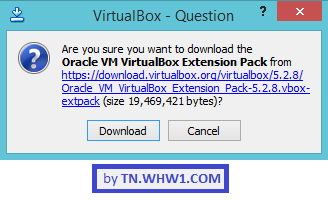
- Run Virtualbox, and hopefully you will get a message indicating that VirtualBox Extension Pack needs to be upgrade, assuming you you installed that extension pack already. If you HAVE NOT installed it, then the following won't apply to you as there will be no such message and VirtualBox will start as normal.
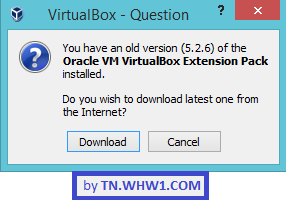
Click Download. - Click Download on following confirmation window.
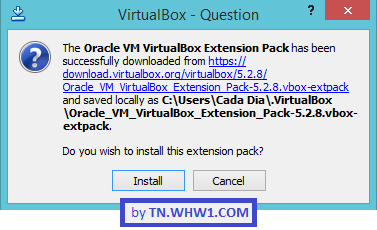
- Click Install on next window.
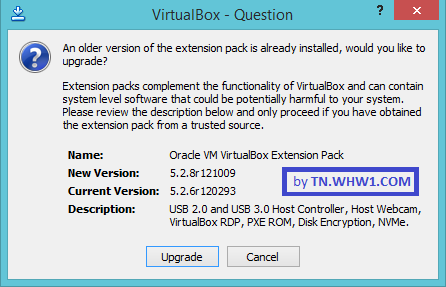
- Click Upgrade on next window for confirmation.
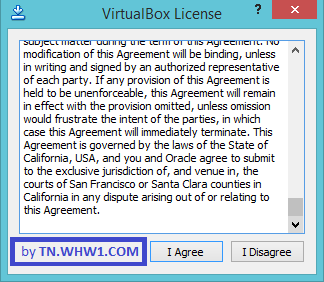
- Click "I Agree" to be able to continue.
- If an "VirtualBox - Error" window shows, then the upgrade has failed. Don't panic. The failure occurs if Administrator privileges could not be gotten. If this happens, then close then click OK button, and close the windows involved with Virtualbox, and then login as the Administrator and do the above steps for ONLY the extension upgrade, and not from the start of the steps. As of writing this paragraph, it meant going back and redoing steps 13 and higher, which is the running of VirtualBox.
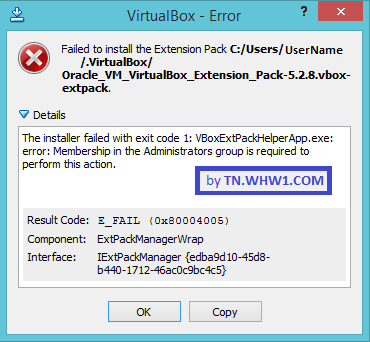
After you press OK, and if you are asked if you want to delete the downloaded extension pack file, click Delete. - Click Yes if you are asked if you want to allow the program to make changes to your computer.
- Wait until extension pack upgrade is complete.
- Click OK.
- When asked if you want to delete the extension pack, I would say click Delete, but that is optional, and you can keep it and archive it for possible future use without needing to download it. It can be useful if it's download is no longer available in the future and you need to use it for some reason with another install of this version, when this version becomes obsolete.
- Upgrades have been completed; You are done.
Consider Contributing
- Article Contribution:
Consider submitting an article of your own to Tech Notes. I will create a sub-category for your article if needed. Guest articles are welcome! - Financial Contribution:
If you found this article or any Tech Notes article useful, and you'd like to make a financial contribution as a simple thanks (no fear, any amount can be given; even just one dollar), you can use the Paypal contribution button which is safe and does not require you to have a Paypal account to make a contribution to Tech Notes.
Feel Free To Leave A Good Comment. :)
Look around this site and it's menus, and you may find other useful articles.


