

Adding Stamp Or Vertical Or Rotated Content In Microsoft Word
First the method for the Word 2000 to 2007 is shown, and then the Word 2010 and higher method is shown.
This article took about 2 hours to make.
For Word 2007 and before. I have tested it on 2000 from what the below images are from.
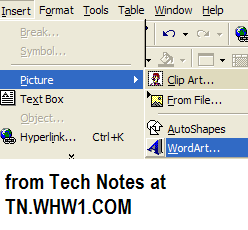
- Go to Insert >> Picture >> WordArt.
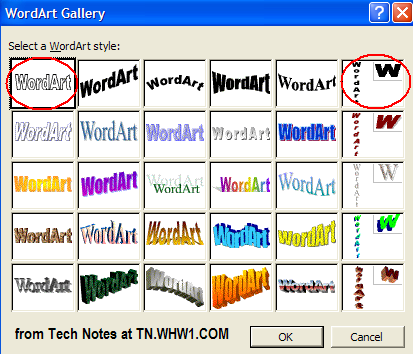
- Select the Wordart format you want. I suggest the outline format. If you just want vertical text, then just select the vertical options given at the right side of that window, and you can skips some steps and go to step 7.
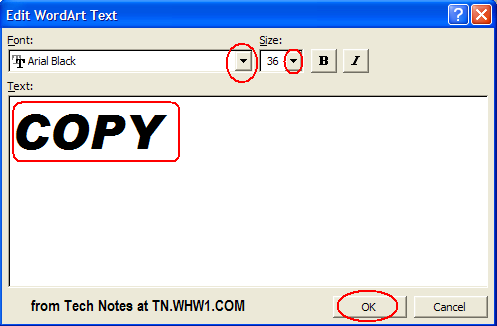
- Type the Word or Phrase you want (Such as Copy, or Confidential, or Duplicate).
- Select the font size and type from the pull down menus of the Edit WordArt Text window.
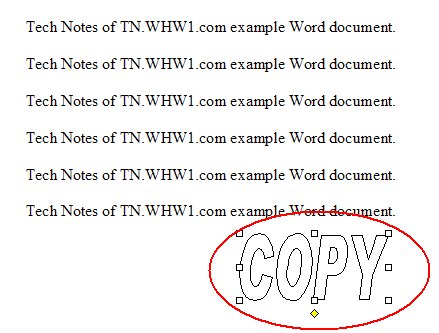
- The inserted WordArt content should already be selected, but if not, then select it.
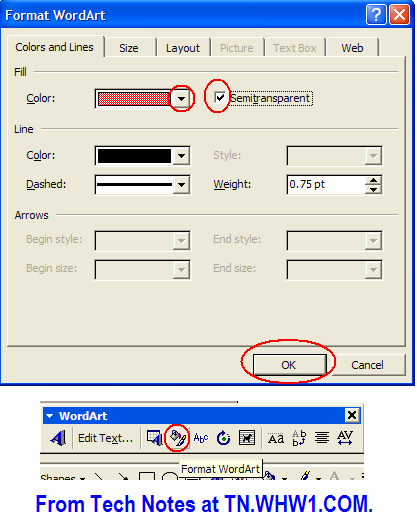
Once the WordArt is selected, you will see a WordArt window appear to allow you to format the content. On the WordArt window select the Free Rotate radio button.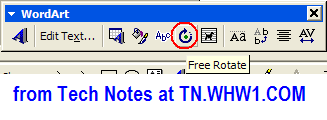
- Four colored control points appear around the WordArt. Select a point and rotate the content to the angel you want.
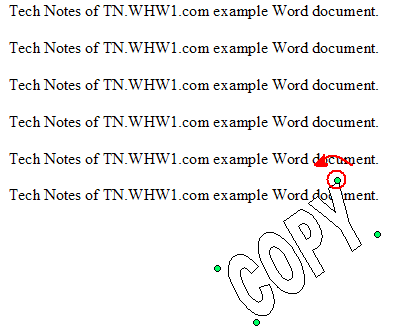
- Turn off the rotation by clicking on the Free Rotate button again. Move your mouse over your WordArt content and hold down the mouse button when you click on it and move the item to where you want it to show within your word document.
- Click on the Text Wrapping button on the WordArt Window and select the format you want.
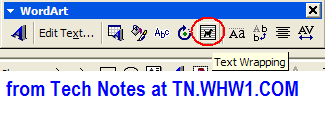
For this example I have select it to go behind the text of the document by selecting the Behind Text choice.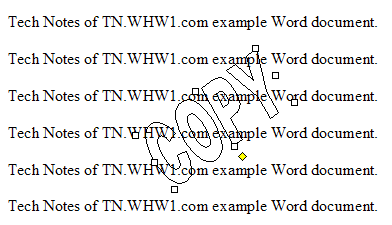
- You can play with the formatting by clicking on the Format WordArt button. In the following, I had it set to fill with Red and made it semi-transparent.
The result is this: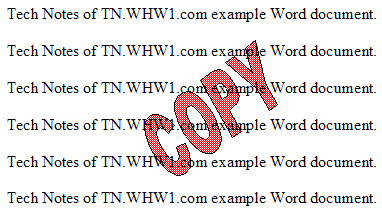
For Word 2010
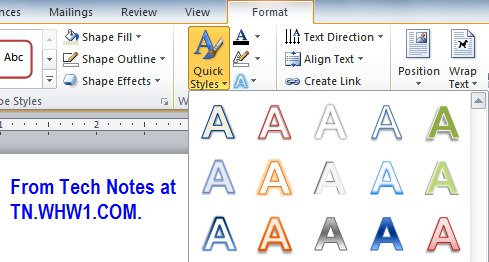
- Select the text box, or select some text inside of the text box to see the Format tab. A quick note that in this version of Word, you can apply WordArt formatting to either the Text within a text box or the text bot itself.
- Click the Format tab.
- Click the Quick Styles command in the WordArt Styles group, and then from the drop-down menu select the Style/format you want.
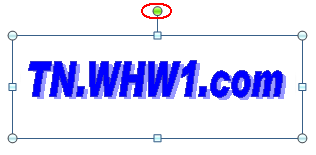
- You can select the Text Direction too in the Format menu. Rotate the text by grabbing the Rotation Handle and rotating in the the direction you want.
I point out that the above techniques can easily be used to place Watermarks on any document. Images can also be inserted and rotated and be placed behind the document content.
Consider Contributing
If you found this article or any Tech Notes article useful, then consider making a contribution as a simple thanks. Any amount can be given; even just one dollar ($1). The Paypal (can use any debit/credit card too) contribution button is safe and does not require you to have a Paypal account to make a contribution to Tech Notes and you do not need to give personal information.
Feel Free To Leave A Good Comment. :)
Look around this site and it's menus, and you may find other useful articles.