


- You are here:
-
Home

-
Computer Related
-
Development
-
Web Design
-
Content Management (CMS)
- Prestashop
Prestashop
This is the Prestashop category. It contains articles and subcategories related to the Prestashop software installed into hosting servers of places like WHW1's hosting services, and stand alone and offline computers. Please look below for articles and subcategories. Submit requests for topics you want articles about.
- Details
- Written by Tech Notes
- Category: Prestashop
- Published: 07 November 2017
Fix For When Prestashop Login Page Does Not Show Login Fields, And Is Mostly Blank On Firefox.
This problem was detected via Prestashop 1.6.x.
Please note that I do not get paid to write these articles.
Reference Note: This article took about 1 hour to create.
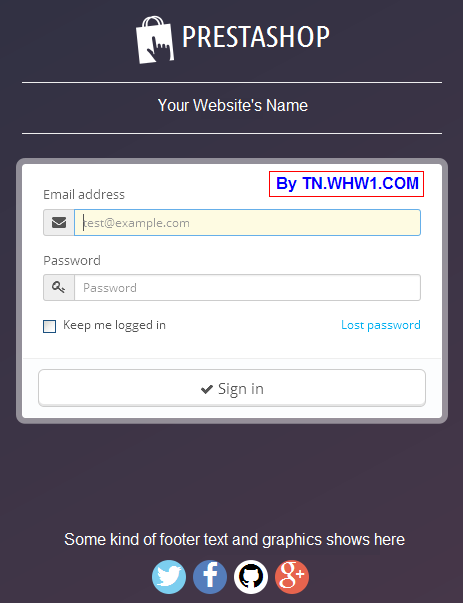
You are here most likely because you have gone to your Prestashop login URL like normal using Firefox, but it's not possible to login, since the username field and password field are completely missing. Most likely, all you are seeing is the page header saying Prestashop, then the Site Title, and the footer at the bottom, and nothing else in except for horizontal lines or minor graphics.

Failed Fix.
Going to Firefox menu of History >> Clear Recent History >> selecting check box for only Cache, Offline Website Data, and Cookies does not fix it.
What Worked For Me
- Trying doing the above data clearing, but also check the boxes for Active Logins and Site Preferences.
- Then reload/refresh your Prestashop login page.
- Now you should see the normal login page with the username and password fields showing like below.
Finished
Consider Contributing
- Article Contribution:
Consider submitting an article of your own to Tech Notes. I will create a sub-category for your article if needed. Guest articles are welcome! - Financial Contribution:
If you found this article or any Tech Notes article useful, and you'd like to make a financial contribution as a simple thanks (no fear, any small amount can be given), you can use the Paypal contribution button which is safe and does not require you to have a Paypal account to make a contribution to Tech Notes.
Feel Free To Leave A Good Comment. :)
Look around this site and it's menus, and you may find other useful articles.
- Details
- Written by Tech Notes
- Category: Prestashop
- Published: 07 July 2017
Solution For PrestaShop Image Regeneration Problem
That Causes A "500 Internal Server Error".
Please note that I do not get paid to write these articles. This article took about 3 hours to make, plus many hours prior research, examination, and testing.
Introduction
When using the Image Regeneration page of Prestashop 1.6, you can get a 500 Internal Server Error showing on your browser. The lower half the page looks like this were the Regenerate Thumbnails button is.
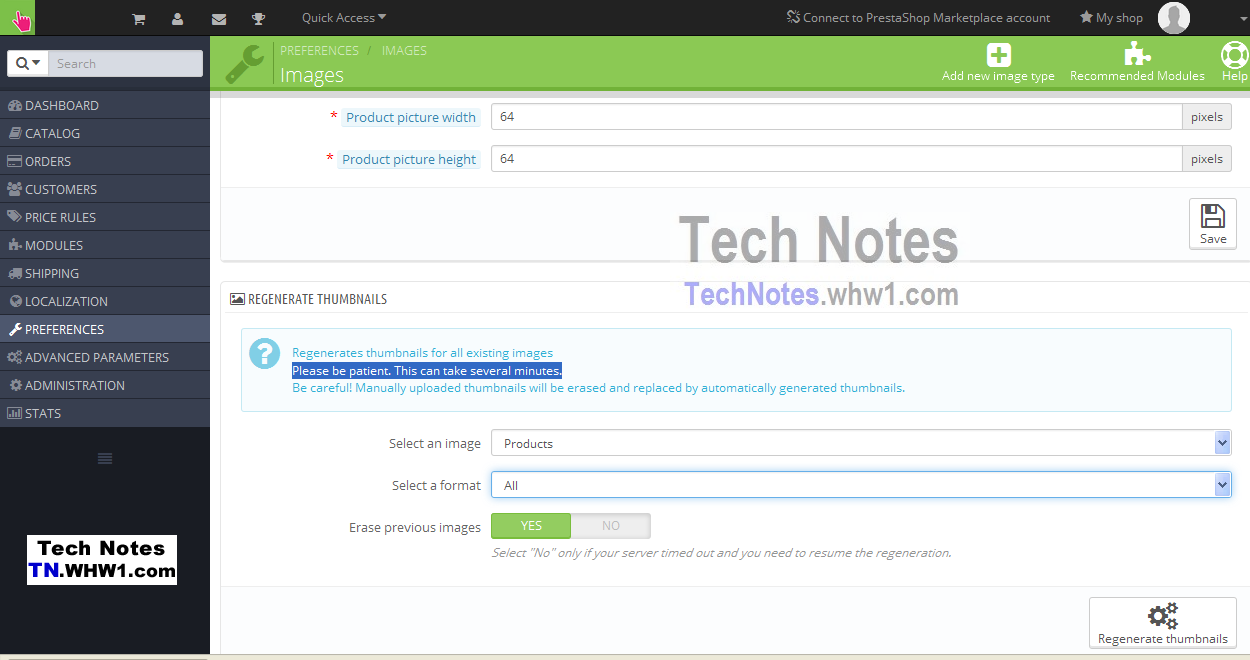
Worse is that after the process starts, all the previous thumbnails get deleted and not replaced and a blank space holder image gets displayed instead. Repeat attempts to regenerate the images does not work.
Often people find themselves on the Prestashop (PS) Image Regeneration page after their website design is complete, and they want to either add a watermark or remove watermarks, or simply need thumbnail images updated.
After many hours of research prior this article, the following solution is being presented here. Note that increasing the php memory limit setting, or the timeout, or execution period does not help resolve the problem. I believe it is related to an Apache config file setting, which most people do not have access to, and really just creates more complication and tracking if modified and also risk of getting overwritten during an upgrade.
Not only will it fix the problem, but also improve your website's back-end/Prestashop panel operation for you.
Based on Prestashop version 1.6.x.x.
Fix Steps
- Upload this file onto your hosting servers files system. You can use either FTP method and any FTP software (a list and tutorials for the most popular FTP softwares are here), or the easy to use File Manager tool (just click on upload) if you got Web Hosting With $1 hosting control panel, cPanel. The original Master document that also includes original Readme doc and license info is here.
- Decompress (unzip) the folder it contains (you can easily do this with WHW1's cpanel File Manager tool by right mouse clicking on the zip file).
- Move or Copy the imageregenerator folder specifically into the modules folder (path would be most likely something like /public_html/modules/ or /www/modules/).
- Login to your PrestaShop control panel as administrator.
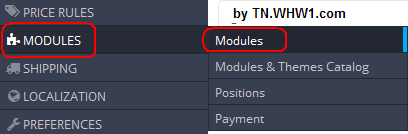
- From PS left menu, go to Modules >> Modules.
- Change the 2 "Filter by" menus to "Modules Not Installed" and "Disabled Modules" or "Enabled & Disabled".

- Do a search for "image regenerator" using your Internet browsers built-in search by clicking on the Control key and F key (Ctrl-F) simultaneously.
- Install the Image Regenerator module by clicking the Install on the right end of the same row.

- That should take you straight into the configuration page for that module, but if it does not, then go to the modules again and this time select Configure from the pulldown menu on the right end of that same row.

- Now click on the thumbnails you want generated, and check the box for watermarks, if you got watermarks module enabled and want watermarks added to the thumbnail images. You can also use this to get rid of all watermarks by first removing the checks on the watermarks module config and disabling it, and then removing the checkmark from the box here. In the below image example, Categories and Products have been selected to get thumbnails generated for.
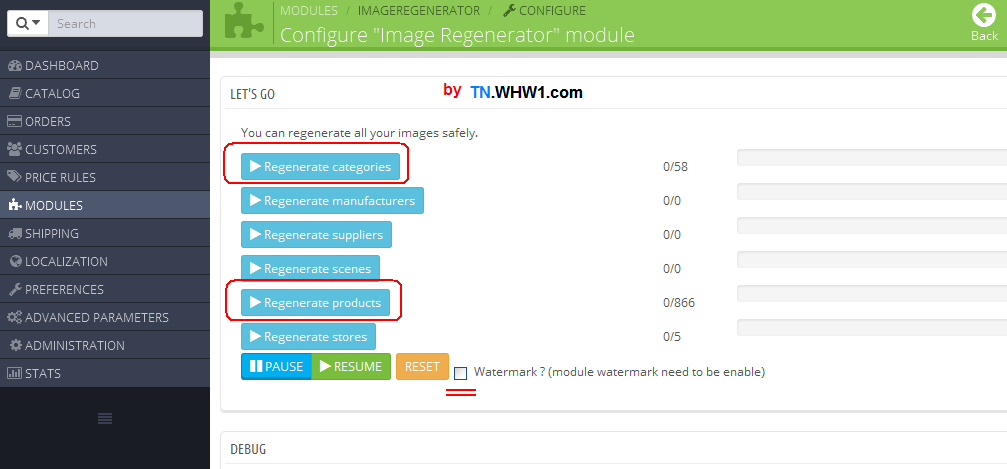
- Wait and Done. Now you wait for the images to be generated, because it can take a while depending on the quantity of products. You will be able to see the progress, and it will also give you a report in the lower half in case any products get an error. You are able to pause and resume too! :)
Resources
The files provided above come from GitHub page here. You can get the original download from there or here at Tech Notes, which also includes their README document and the original instructions
Consider Contributing
- Article Contribution:
Consider submitting an article of your own to Tech Notes. I will create a sub-category for your article if needed. Guest articles are welcome! - Financial Contribution:
If you found this article or any Tech Notes article useful, and you'd like to make a financial contribution as a simple thanks (no fear, any small amount can be given), you can use the Paypal contribution button which is safe and does not require you to have a Paypal account to make a contribution to Tech Notes.
Feel Free To Leave A Good Comment. :)
Look around this site and it's menus, and you may find other useful articles.
- Details
- Written by Tech Notes
- Category: Prestashop
- Published: 17 July 2014
How To Remove "Powered By PrestaShop" And Other Things From Bottom Of Footer On A PS Website
Please note that I do not get paid to write these articles.
The following is using Prestashop 1.5 version images, but similar process and selections exist for 1.4 and 1.6. So, this should still be useful regardless which of those versions you are making use of.
- Method 1.
By removing check from CMS Block checkbox to not show footer message.- Login to your PrestaShop control panel (back end office).

- Select Modules from the Modules menu at top.

- Scroll down and find CMS Block, and click on Configure for that module.

- Scroll down and remove the check from the checkbox that says Display "Powered by PrestaShop", and then select Save.

- You will see a message say it has been updated:

- Go to your website, and refresh/reload the website, and if needed clear your Internet browser's cache (typically done from the browser's Tool or History or Option menu, depending on your browser vendor and version). You should no longer see the footer showing the Powered By Prestashop line. If it still shows, then try the following after this.
- Login to your PrestaShop control panel (back end office).
- Method 2 - In Addition To Above.
Force Compilation. If the above method does not work, then after doing the above, try doing the following to force compilation.- Select Performance from the Advanced Parameters at top menu of your PS control panel.

- Click the button to Clear Smarty cache & Autoload cache, and wait for the page to refresh.
- Then, change Template Cache setting to be Force Compilation, and push Save.

- You will see a message say Update Successful.

- Set the Template cache back to "Recompile templates if the files have been updated" or similar phrase, or other choice if you want, and then press Save.

- Select Performance from the Advanced Parameters at top menu of your PS control panel.
- Method 3.
Modifing the file (blockcms.tpl) that contains the code showing the Powered by PrestaShop and copyright messages. If the above two methods fail for you, then you would want to try modifying the blockcms.tpl file that contains the lines that cause the unwanted lines in the footer of your website pages. I will not cover the various tools or methods you can use to access and edit such a file, but quickly metioning that you can use such things as WHW1's cPanel Code Editor or just Editor from within the cPanel File Manager tool, or use a Notepad along with a FTP software. My example below will have images from File Manager of cPanel and either the Code editor and/or Editor access from within that File Manager tool.- Access your hosting file system, and go to where the /modules/blockcms folder is. Typically, that would be /public_html/modules/blockcms.
- Copy the blockcms.tpl file as a precaution. If using cpanel File Manager tool (such as that provided by Web Hosting With $1), then right mouse click on the file of blockcms.tpl to see a menu, and choose Copy, and then follow instructions and give the same name plus a time stamp for the copied file; such as blockcms-201707151820PDT.tpl. The timestamp of 201707151820PDT (Means July, 18, 2017 6:20 PM, Pacific Daylight Time) is optional, and you can name it anything you want.

- Once you have a copied file, then edit the file. You can download the file and edit it and upload it back or use the File Manager tool as indicated above and choose Code Edit.

- Search for the word "Powered" in the blockcms.tpl file.


- "Comment out" (disable) the line that has the Prestashop showing. It is done by simply adding "<!--" before the section, and "--> after the section".

- Save the modified file by simply clicking on the Save Changes button.

- Go to your website, and refresh/reload the website, and if needed clear your Internet browser's cache (typically done from the browser's Tool or History or Option menu, depending on your browser vendor and version). You should no longer see the footer showing the Powered By Prestashop line. If it still shows, then try the following after this.
- Access your hosting file system, and go to where the /modules/blockcms folder is. Typically, that would be /public_html/modules/blockcms.
- Method 4.
One of the above methods should have worked. If not, then that means you are using a theme that is not compatible with the normal above methods (especially the first two methods). You will need to find the file that contains the code used to display the content of the footer. For example, some themes will put such code lines into a footer.tpl file. It could be located somewhere like /home/YourFolderPath/public_html/themes/ThemeName/footer.tpl- Modify (edit) the file as described above for another .tpl file, which means search for Powered, and then comment out (disable) the appropriate lines for footer, and save the modified file and refresh/reload your website page and check to see if footer message is gone or changed according to you.
Feel Free To Leave A Good Comment. :)
Look around this site and it's menus, and you may find other useful articles.
- Details
- Written by Tech Notes
- Category: Prestashop
- Published: 26 May 2015
How To Add Coupon/Voucher/Discount Code For Shoppers To Use At Your Prestashop Site
Please reference the steps applicable to your version of Prestashop (PS).
Note that I do not get paid to write these articles. If you found it useful, please let me know, and mention my site on your site, blog, and/or social posts. My thanks in advance.
This article took more than 2 hours to research and create.
Steps
First step applies to any of the Prestashop versions.
- Login to your Prestashop back office.
For Prestashop 1.5
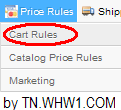
- Select Cart Rules from the top Price Rules menu.
- Select "Add new" button.
- Complete the Information section as shown. For this example, a 10% discount is created for all things and any shopper.
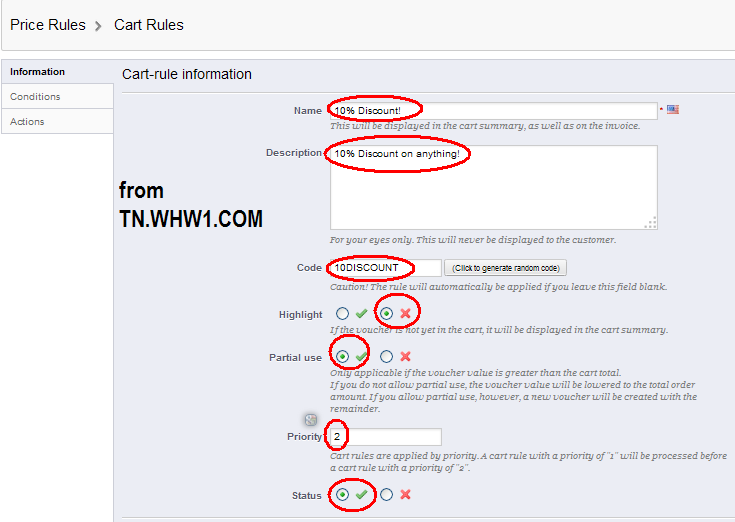
Notice that the Priority has been changed from 1 to 2 (you can set it higher too). I'll explain the reason for this with an example. Lets say you are also giving a $5 discount that can be combined with other Discounts (Vouchers/Coupon Codes). The highest priority discount gets applied first. If the $5 discount code has a priority of 1, then it gets applied and then the 10% discount gets applied. - Select the Conditions, and complete it as shown in this example, or in the way that you need.
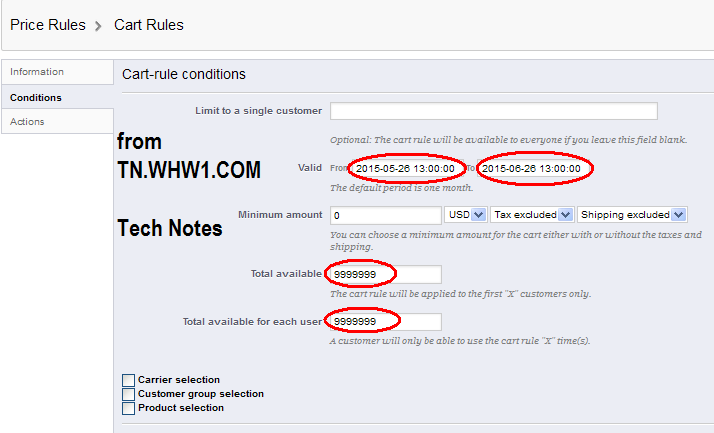
In the above, no specific customer has been indicated so it can by used by any shopper. The date range has been set for 1 month, and no minimum spending requirement, which you can easily change with the "Minimum amount" settings. For the "Total available" and "Total available for each user", enter a very large value based on the monthly purchases and/or visitors you get; something that would cause the discount to not run out within the period the code is valid. Alternatively, you can specify a limited quantity of these to be used by all, and also specify how many times the same client can use this voucher/discount code. - Select Actions from right menu, and complete it as shown here in this example, which is for a 10% discount. You can change it to your own type of discount and amount or percentage.
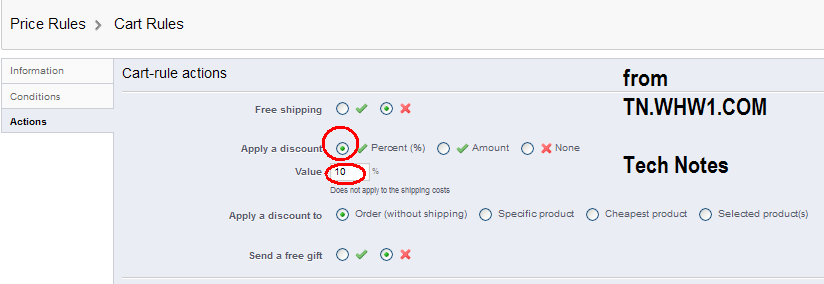
- Click on Save, and let customer know about your Promotion, or Discount, or Coupon Code.

For Prestashop 1.4
The section for Prestashop 1.4 still needs to be written up more. If you need it to be more elaborate, please comment below.
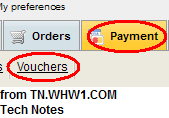
- Select Payment from top menu, and then select Vouchers.
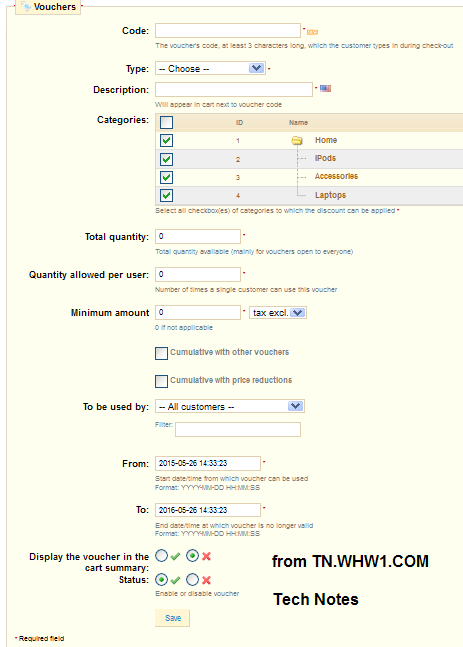
- Select "Add new" button.

- Complete the Vouchers page and once done click on the Save button near the bottom of the page.
Feel Free To Leave A Good Comment. :)
Look around, and you may find other useful articles. Add this site to your Bookmarks/Favorites for easy return for new articles. Consider submitting technical articles for publication, including your embedded links. I will even create a new category if needed.
- Details
- Written by Tech Notes
- Category: Prestashop
- Published: 15 May 2014
Changing colors of Prestashop
Please note that I do not get paid to write these articles.
How to change colors of background, titles, texts etc. of Prestashop default theme?
Edit the global.css file in your default themes css folder. These days, if you have an updated Internet browser, you can push the right mouse button on anything within a web page, and choose Inspect Element or similar wording or Firebug, and that will shows you the CSS style info and where the CSS file you need to edit is located at on the server. If your hosting control panel is as easy to use and full of tools like the one WHW1 provides, then you can edit the code directly on the server by right mouse clicking on a file using the File Manager tool and choosing Edit Code or similar wording.
You can modify the tab and button colors by downloading all the images from the themes/prestashop/img folder, and using a simple image editing software like Paint, or more elaborate softwares like Paint Shop and Adobe Photoshop, and Image Makers, etc. You can use free software like Gimp to modify the images too. Once you have modified the images, then upload them back to the server using something like FTP or the File Manager tool often provided within the hosting control panel. WHW1 has more than one, and I use the cpanel File Manager tool.
Feel Free To Leave A Good Comment. :)
Look around this site and it's menus, and you may find other useful articles.
- You are here:
-
Home
-
Computer Related
-
Development
-
Web Design
-
Content Management (CMS)
- Prestashop